Are you facing difficulty in creating a personal WordPress blog? Do you have lot of questions regarding how to build your personal blog?
If yes, then you are at the right place.
I will tell you how to build your online presence or bring your business online by creating a personal WordPress blog.
After reading this post, you will understand how easy it is to build your WordPress blog or website.
But before diving into the steps on how to set up your WordPress website, first, let’s understand the importance of having your personal blog or website, or you can also say your property on the web.
Importance Of Having A Personal Blog/Website
Have you ever done your business without an email id? Obviously no. But why do you use an email id? Let me tell you the answer. You use an email id because you know the importance of having your email id and, of course, its use. An email id helps you handle all conversations professionally and makes you look more responsible and authentic. It makes it easier for partners and clients to trust you.
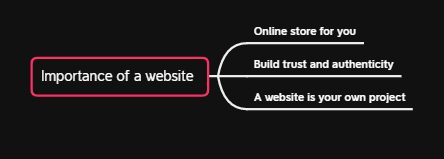
Similarly, having your personal blog/website is essential to bring your business online. Your website acts as an online store for you. Before contacting you, your clients look at your website, which helps build trust and credibility for you, and it becomes easy to get sales as the trust factor is built.
Now after reading till here, you must be thinking that websites are important only for business owners but it’s not true.
Even if you are a student or a freelancer who wants to start something of your own or want to go for a job, then a personal blog/website is necessary because it acts as your project where you practice what you have learned.
Suppose you want to go for a digital marketing job or you want to work as a digital marketing freelancer, in both cases a personal blog/ website will surely benefit you. It will be your project where you actually implemented all the digital marketing concepts which will give you an upper hand that you not only know about digital marketing but also implemented it all by yourself.
But employers and professionals will take you seriously only if you have a cleanly designed blog/website with some articles published on it from your industry.
You must be thinking that setting up a personal blog/website that is good-looking is a difficult task. I also used to think the same way but thanks to the Digital Deepak Internship Program, which I joined a few months back, where I learned how to set up my own personal blog on WordPress. Trust me, it is not at all difficult if you clearly follow the steps I am going to tell you.
I will be telling you the steps to create your first personal blog/website on WordPress but first let’s understand why I have chosen WordPress for my personal blog.
Why You Should Create Your Personal Blog/Website On WordPress?
First, let me tell you the difference between a website and a blog.
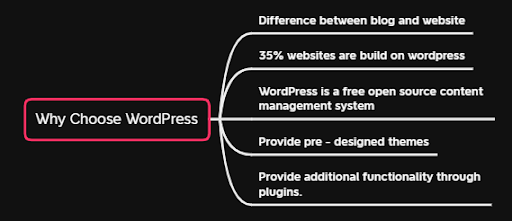
A website is a site that has static pages with no regular updates.
A blog is also a website where you regularly post new and fresh content.
Search engines also rank websites that have regular posts rather than static websites.
Do you know that 35% of the total websites on the internet are built upon WordPress?
WordPress is an open-source content management system that you can install for free at the backend of your website. As it is open-source software so many plugins are built on it to enhance functionality. It also comes with a set of pre-designed themes from which you can choose for your blog/website.
So now you know about WordPress and why you should build your personal blog/website on WordPress Let’s move to the steps to set up your WordPress blog.
So let’s get started.
Step By Step Guide To Create Your First Personal WordPress Blog
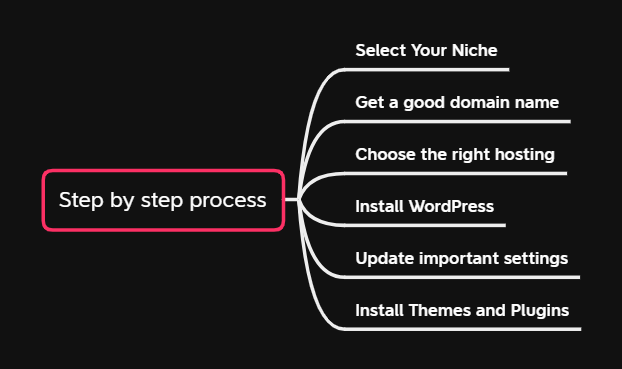
#1 Select your Niche
Choosing the right niche for yourself can make you anxious initially but your success and wealth solely depend upon the niche you choose. Here you might be thinking about how to choose a niche? Let me tell you that the selection of niche is the combination of Passion, Talent, and Market. Other factors of your business will only work if you have the right niche. While selecting the niche you must keep in my mind that talent and passion are required but most important is to identify the market which can be explored for your niche and you can showcase your talent. If you need step by step guide on how to identify your profitable niche then check out my article “7 Steps to Identify a Profitable Niche in Digital Marketing”
#2 Choose the right domain for yourself
A domain name is basically the name of the website. It is the address that people type in the browser URL bar to visit your blog/website. The domain name of this blog is tanimawadhwa.com.
I want to tell you how to choose a good domain name for yourself because you cannot change the domain name in the future. I was very confused while buying a domain name for myself so I don’t want you to go through that confusion.
So below are some tips that you can keep in mind while buying a domain name for yourself.
Some tips for choosing a domain name for your personal blog
- Choose a .com domain
I would recommend you to buy a .com domain name because you will not miss out on traffic from countries outside India and after your blog grows and get a lot of traction it will be difficult to get a .com domain as it will cost you more.
- Use your personal name
Choose a domain name as your own name. Having a domain name as your name will help you in building your personal brand and people are likely to get connected with real people than a brand or with people with hidden identities. If you are not able to find a domain name with your name or it costs much then you can try adding a prefix or suffix to your name. For Example digitaldeepak.com.
- Don’t add twists to your domain name
Keep your domain name simple. Don’t use unnecessary twists like using complicated spellings or creative misspellings. For example flipkart.com. People can mistakenly type flipcart and can land on another web page and you will end up losing your traffic.
P.S: flipkart.com is only used as an example here.
- Keep your domain name short
Try to keep your domain name short, not more than 10 characters, so that it becomes easier for people to remember it.
You can also go for 2 words domain name as these are the best. One-word domain names are difficult to find and 3 words domain names are difficult to remember.
My domain name is tanimawadhwa.com. It has 2 words and 12 characters. First I wanted to get a domain name as tanima.com but that was not available, my bad!
Anyways, I went with tanimawadhwa.com and this is also nice. Right?
- Avoid using numbers and hyphens
Don’t use numbers or hyphens in your domain name. It will become a difficult task for you to tell your domain name to others, making it difficult for others to remember it. People tend to forget numbers and locations where a hyphen is used in the name. So avoid using them.
Now that you know the points to keep in mind while purchasing a domain name, go and get a domain name for yourself and read another step to get good hosting for your blog.
#3 Choose the right hosting for your blog
Web hosting is the service on which your blog is built. It is required to access your website on the internet. Without web hosting and a domain, nobody will be able to see your blog. It is a necessity if you want to build your website.
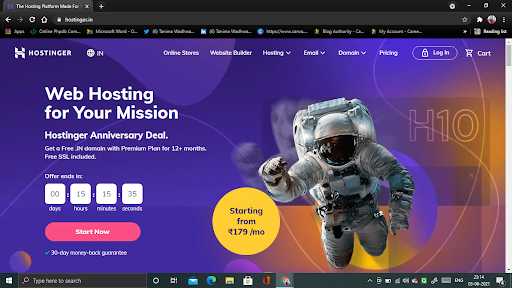
There are many web hosting companies, you just need to find one which fulfills your requirements. If your budget is high and you can easily spend some bucks then go for WPX hosting it’s the best. But if your budget is low or you just want to try out things, you can also go for Hostinger. I am also using Hostinger premium web hosting for my website.
Hostinger also offers optimized WordPress hosting for a very low price with amazing features and resources. You can easily set up everything, even if it is your first time getting a hosting or using WordPress.
Now let’s get to the steps on how you can set up your hosting
- Click on the link here Hostinger.in. After clicking you will come to the page which is shown below.
P.S: I am not using any affiliate link here. This article is only written with the intention to help you out!
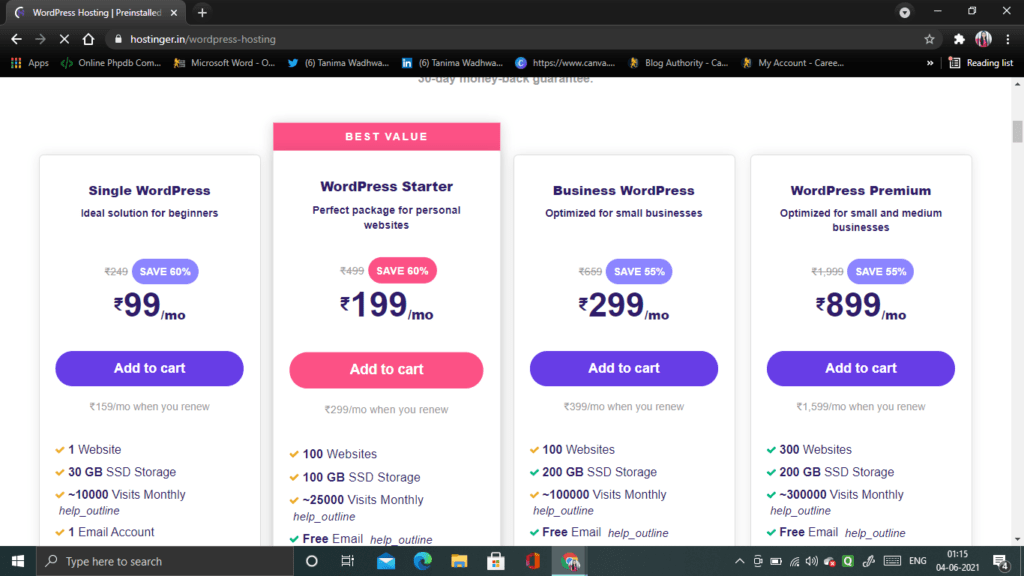
- Now go to hosting and choose WordPress hosting because it is fully optimized for a WordPress site. I made this mistake. I don’t want you to repeat it 🙂
The plan I am using is also not bad but it is not specific for a WordPress blog/website.
Now select any of the plans and proceed.
- After that, you see this screen 👇🏼
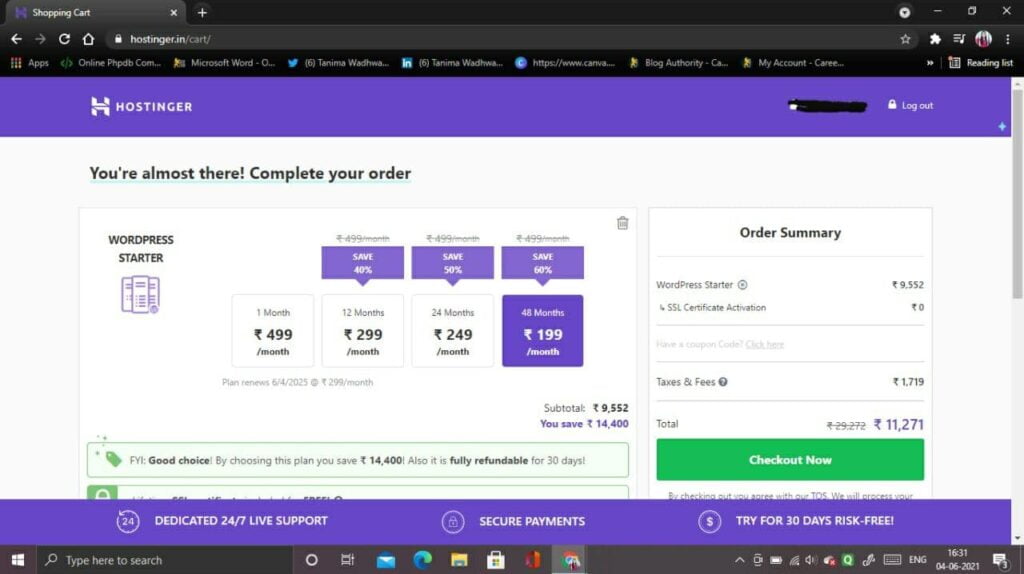
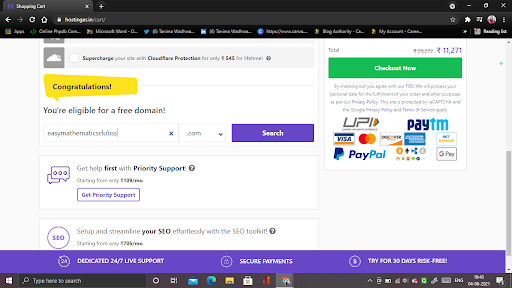
In hostinger you also get a free lifetime SSL certificate and a free domain for 1 year. Isn’t it cool 🙂
You can check out the availability of your favorite domain name and proceed with the payment.
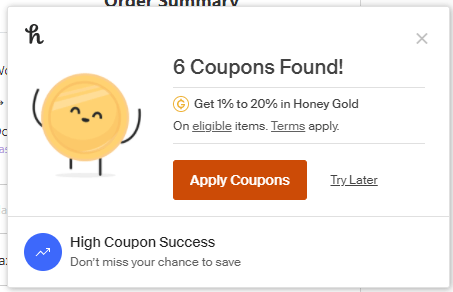
Don’t forget to use Honey extension to get extra discount coupons.
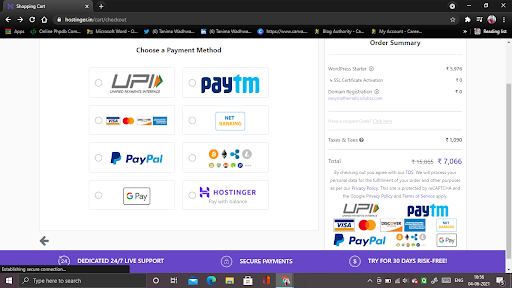
One more good thing about Hostinger is that it is optimized for payment methods like Paytm and other UPI payments.
If you want to know about other hosting providers, check out this article.
#4 Install WordPress
After you finish your purchase you will get to this screen 👇🏼

- Click on Start Now and then select your domain.
- Complete your domain registration.
- Select the option to build a new website.
- Now you will directly get the option to create your WordPress account. Be sure that you don’t forget your website details.
- Click on finish setup, wait for a few moments, and you’re done.
Now let’s update important settings for your website.
#5 Update Important Settings
Congratulations you have finished all the 4 steps explained above. Now your website is ready. You just need to set up a few things and you are good to go.

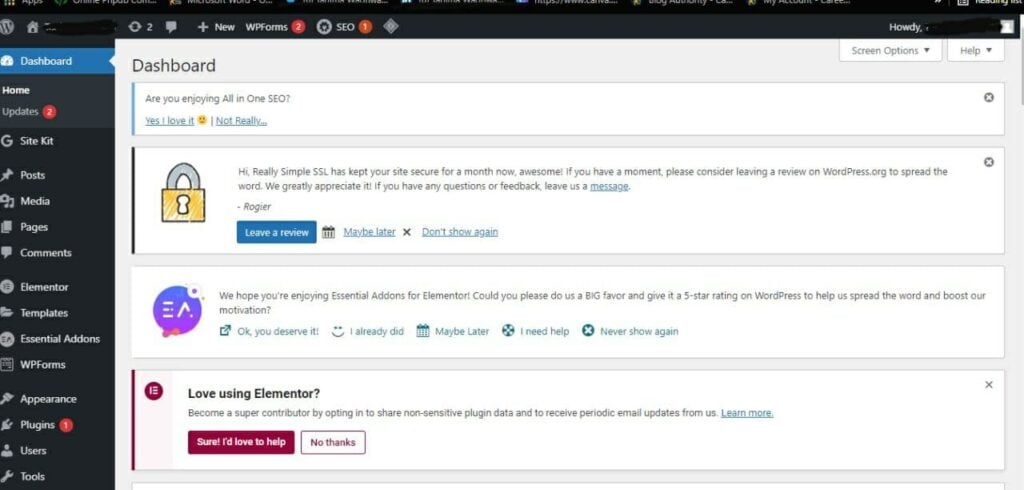
Now click on Manage WordPress and you will land up in your WordPress dashboard. This is the place from where you will operate your website.
Let’s start updating settings now.
- Update Permalink
Permalink is the link your visitors see for your page or post on your site. It includes your domain name and the slug. Slug is the part of the link that comes after the domain name. Permalinks are important for your website because google search engines use these URLs to index your posts and pages. And this setting is also good for SEO purposes. So make sure you use the correct form of permalink setting for your website.
To change permalink settings
Go to settings > Permalinks > Choose postname > Click save changes.
- Next change the site title and tagline
Site Title is the title of your site and tagline is the short phrase describing your site.
To update them go to settings.
Also, don’t forget to change the timezone to UTC +5:30 ( for India)
- Install SSL Certificate (The one you got free from Hostinger)
Now go back to this screen 👇🏼

Click on Manage Site, hpanel will open like this one👇🏼
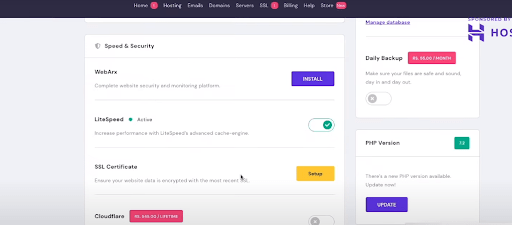
Click Setup SSL > Select your domain > Click Install
Now SSL will be installed successfully.
Also, click the Force HTTPs button on. Now just wait for the notification to pop up.
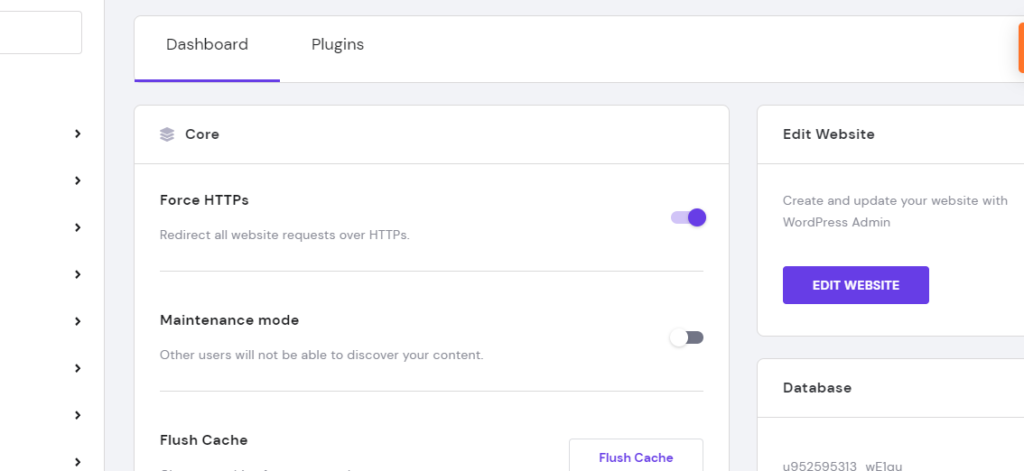
Now go to your WordPress dashboard and refresh your website. Your website will load with a lock icon and secured written now.
Congratulations you have updated all the important settings for your personal blog.
#6 Install Themes and Plugins
Congo once again, you are just one step away now!
The only thing left is designing your blog and adding functionality to it so that your blog looks and behave smarter like you 😀
There are many themes from which you can choose. But always consider the factors mentioned below while choosing a theme for your personal blog.
- Lightweight theme
- SEO friendly theme
- Simplicity
- Supported Plugins
- Color Scheme.
You can use themes by going to Appearance > Themes.
I’m using the Astra theme for my blog.
You can install plugins by going to Plugins > Add New. Either download them by searching them or uploading the zip file.
You can also change another appearance settings by clicking “Customize your site” in your WordPress dashboard.
And boom!! You are all set to launch your first personal WordPress blog. All the best!!
Conclusion
I hope this article helped you in setting up your first personal blog/website. If YES! Then do share it with your friends and comment below which part you liked the most or faced difficulty in. You can also ask me your doubts if you have any by commenting below. I will be more than happy to answer all your questions.
Cheers,
Tanima
Nice article, good images
Thanks for writing, keep it up!
I am glad you liked it.✌
Awesome,I have gained more knowledge from your blog,keep sharing such blogs.
Thanks,✌ I will be sharing more such blogs stay tuned.